How to Improve Your Drone Flying Skills (Simple Exercises to Try)
Nobody’s a great drone pilot from day one. Like learning to ride a bike or play an instrument, improvement comes with consistent, focused practice. And the good news? You don’t need fancy gear or exotic locations to level up. Just a safe open space and a few repeatable drills can work wonders.
Below you’ll find a structured path of beginner, intermediate, and advanced skill-building exercises. Each is explained with real-world application, tips for mastering it, and common mistakes to avoid. Try one or two each week and track your progress — your footage (and confidence) will dramatically improve.
BEGINNER EXERCISES: MASTER THE BASICS
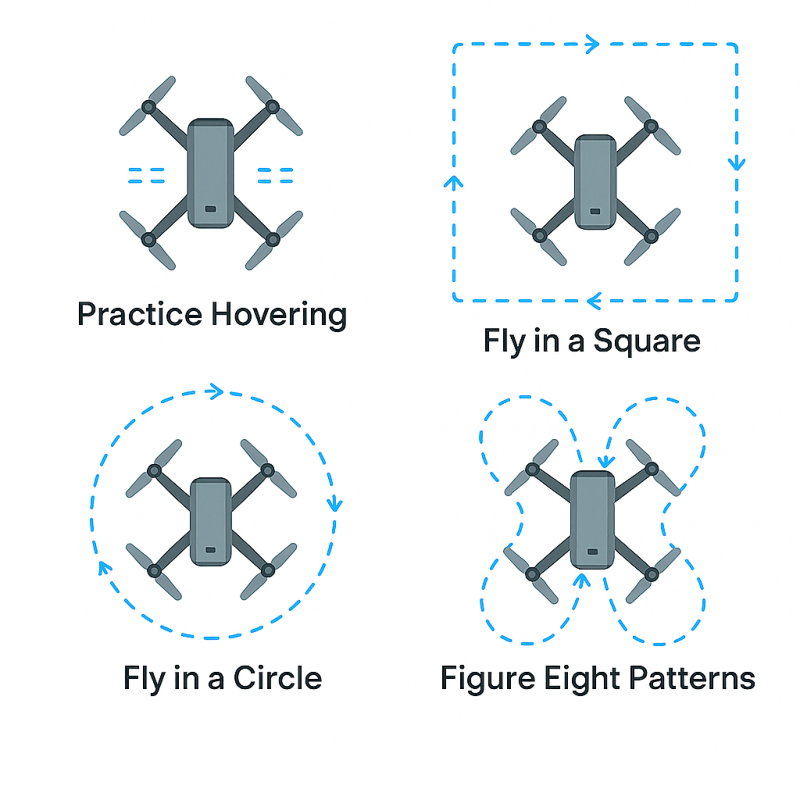
1. The Hovering Drill
This is where every pilot should begin. Hovering teaches control and builds your understanding of how your drone responds to your inputs and external factors like wind. Start by flying to about 5 metres (15 feet) and try to hold the drone in place for 30 seconds. Watch how it drifts and how you need to adjust.
Over time, try hovering at different heights and in different lighting or wind conditions. Once you can hover confidently in place, you’ll notice how much smoother your transitions, pans, and landings become. It’s also a great confidence booster when flying in new or tighter areas.
Use landmarks, painted lines in car parks, or set out cones to test your accuracy. Try recording the hover and review the footage to see if you drifted — it’s easier to correct what you can see.
2. Practise Basic Controls
This exercise breaks down each stick movement so you understand how each function affects the drone. It helps eliminate confusion when you’re under pressure or framing a complicated shot. Fly forward 10 metres, then stop. Now fly backward the same distance. Repeat this with sideways movement (left and right) and rotations (yaw left/right).
These drills are simple but extremely effective. Do them slowly to reinforce precision, not speed. Don’t just rely on watching the drone — glance at the screen and understand how the movement affects your composition.
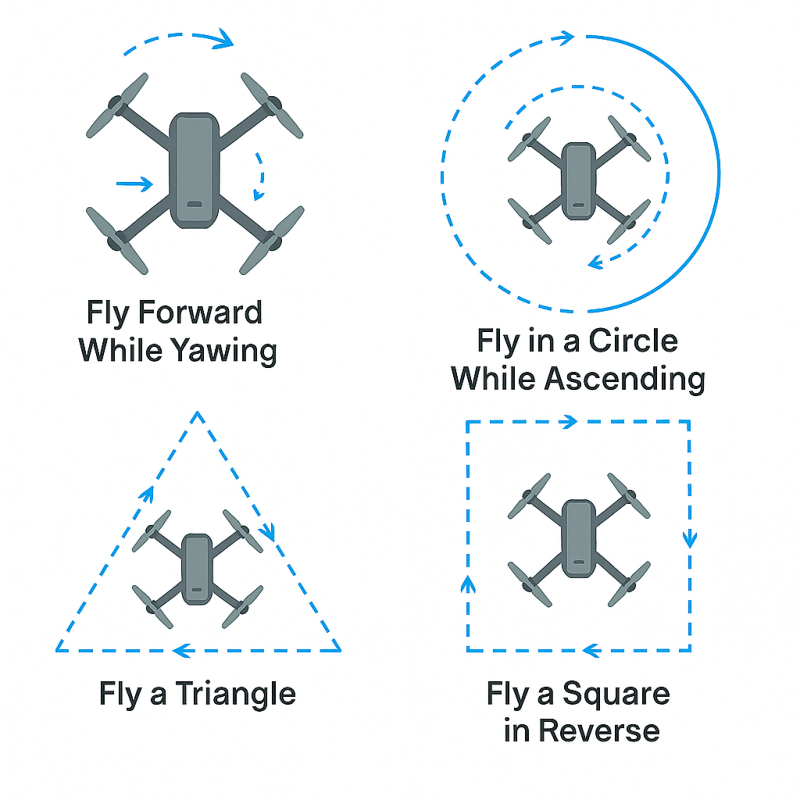
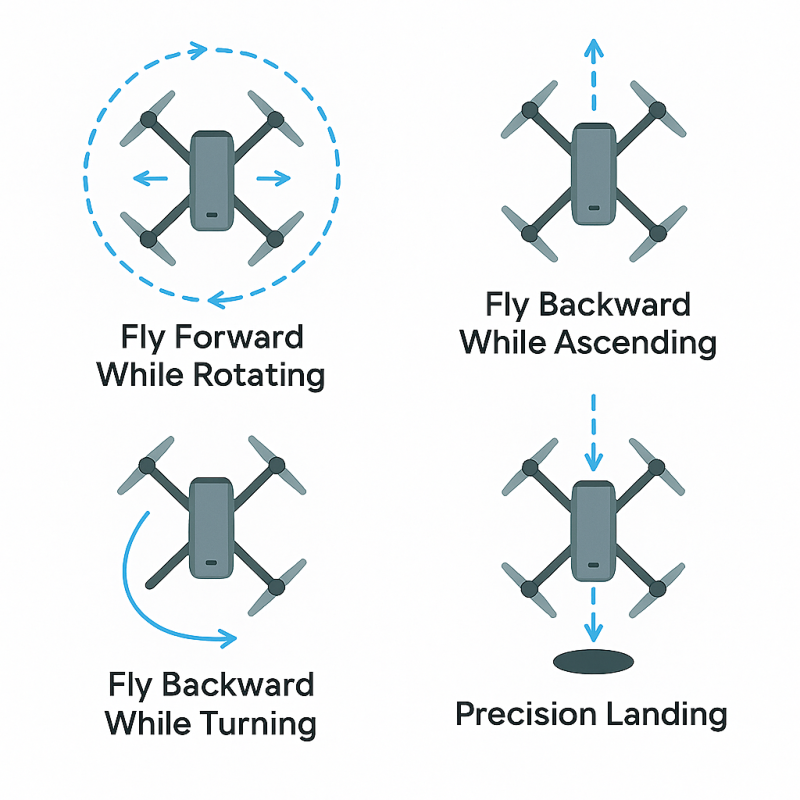
Once you’re confident with each axis separately, start combining them. Fly forward while yawing left. Then try sliding sideways while descending. This is the foundation of cinematic movement, and the sooner you develop comfort with mixed controls, the smoother your footage will become.
3. Land Safely Every Time
Manual landings are one of the most overlooked but essential skills. Practising smooth landings builds control and prepares you for unexpected returns, wind shifts, or tight spaces. Begin by landing slowly from 2 metres up. Focus on staying level and centered on your landing zone.
Increase the challenge by landing from higher altitudes and trying different surfaces (grass, concrete, sand). If you’re using a landing pad, make it a game — can you land within the circle every time? This trains accuracy and also helps reduce damage to your props or gimbal in the long run.
Watch out for sudden downward stick movements which can cause bounces. Aim for a steady, smooth descent and cut throttle only once you’ve touched down. Practice this until it becomes second nature — you’ll thank yourself during windy landings on rocky cliffs or boats.
INTERMEDIATE EXERCISES: BUILD CONTROL AND FLUIDITY
4. Fly a Square Pattern
This drill sharpens directional awareness and helps you stay spatially oriented. The idea is simple: fly forward 10 metres, then yaw 90° to the right, fly another 10 metres, and repeat until you complete a square.
It sounds easy until you factor in wind, perspective shifts, and maintaining altitude. Repeat the square in both clockwise and anti-clockwise directions. Then increase your challenge:
- Try flying the square backward
- Add small altitude changes at each turn
- Try the square while looking at your screen only, without watching the drone directly
This kind of spatial awareness is essential when navigating buildings, trees, or flying in locations where GPS signals might drop out briefly.
5. Master the Figure Eight
The figure eight helps you build multi-axis control and is a core skill in smooth, cinematic flight. Start by flying in an open space and mapping out a wide horizontal 8 using two cones or imaginary points.
You’ll be adjusting roll, pitch, and yaw simultaneously — which trains coordination. Go slow and focus on:
- Maintaining consistent altitude
- Keeping the flight path smooth and rounded
- Using yaw and roll together, not independently
As you improve, make the pattern tighter, try different speeds, or fly the figure eight in reverse. Bonus tip: record the exercise and review your path to fine-tune your technique.
6. Lock on a Subject While Circling
This is one of the most valuable skills in travel videography — keeping a subject (like a lighthouse, person, or boat) centred while orbiting around it. Start with a large radius and slow speed, then reduce both as your confidence grows.
Focus on:
- Keeping the subject in frame while maintaining distance
- Combining yaw and roll smoothly
- Avoiding jerky inputs — your goal is one seamless arc
This manoeuvre is known as the “orbit” shot and is essential for professional-looking footage. It may take dozens of tries to nail it — but once you do, it becomes your go-to move on scenic cliffs, ruins, or even solo selfie reveals.
ADVANCED EXERCISES: FLY LIKE A PRO
7. Fly in Manual or “Cinematic” Mode
If your drone has a “cinematic” or “tripod” mode, this is your cue to start using it. These modes slow down control sensitivity, allowing for buttery-smooth shots. If you’re flying a drone that allows full manual mode (like DJI FPV or Avata), this is where you truly test your piloting skills.
Manual control strips away automation — no GPS stability, no altitude hold, no auto-brakes. It’s just you and the sticks. Practise low to the ground over soft surfaces and go slow. Focus on:
- Maintaining altitude without auto-hold
- Making subtle adjustments instead of jerky corrections
- Understanding momentum and inertia in manual flight
This skill takes time but gives you creative freedom far beyond auto modes — especially for cinematic reveals and action-style shots.
8. Combine Moves for One-Take Shots
One of the best ways to challenge yourself is to combine multiple movements into a single, flowing shot. Instead of doing a simple pan or dolly in, try this:
- Ascend slowly while moving forward
- Rotate (yaw) left while orbiting right
- Pull back while tilting the gimbal up to reveal a subject
This level of control takes practice, but once you can string movements together, your footage becomes instantly more cinematic. Record your sessions, take notes on what worked, and try to replicate smooth “one-takes” in different environments — beach dunes, forests, cliffsides, or city parks.
9. Simulate Emergency Landings
This might sound scary, but practising emergency protocols is essential. What happens if GPS fails? What if wind picks up and you’re far away? Or if you suddenly lose orientation?
Set up drills where you:
- Fly out 100 metres and simulate return with low battery warning
- Land in an alternate safe zone, not your takeoff point
- Practise toggling return-to-home manually
These scenarios help you stay calm and responsive when things go wrong — and they often do. Bonus: if you’re flying over water or unfamiliar terrain, these drills could save your drone.
Next Steps
Want more practice tips? Explore these guides:
- Beginner Drone Flying Tips
- How to Improve Your Drone Flying Skills
- Top 5 Flying Skills Every Drone Pilot Should Master
- View Our Drone Guides
Final Thoughts
Improving your drone skills isn’t about expensive gear — it’s about consistent practice, thoughtful drills, and reviewing your footage to get better each time you fly. Whether you’re hovering in your backyard or orbiting an island lighthouse, the most important thing is to keep flying with purpose.
Stick with the exercises that challenge you, revisit the basics regularly, and don’t be afraid to get creative. With time, your movements will become smoother, your confidence will grow, and your footage will tell better stories — shot by shot.
FAQs – How to Improve Drone Flying Skills
What are the best places to practise drone flying for beginners?
The best places for beginners to practise drone flying are wide-open, obstacle-free areas like empty sports fields, large parks, rural paddocks, or quiet beaches. These environments reduce the chance of crashing into trees, buildings, or power lines and allow you to focus on basic controls without distractions. Avoid busy parks or areas with people and pets. For more detailed suggestions, check out our article on great practice spots for new pilots.
How often should I practise to get better at flying a drone?
To improve your skills, consistency is key. Practising just 15–30 minutes, two or three times a week, is often more effective than flying for hours once a month. Focus on structured drills like hovering, figure eights, and smooth landing routines. Regular short sessions help build muscle memory and confidence over time.
Can I use a drone simulator to improve my flying skills?
Yes, drone simulators are a fantastic way to practise flying in a risk-free environment. Apps like DJI Flight Simulator or third-party FPV simulators allow you to hone your stick control, practise emergency recovery, and explore advanced flight patterns. Simulators are especially helpful in bad weather or when you can’t get outside to fly.
What’s the difference between beginner and intermediate drone flying skills?
Beginner skills focus on basic manoeuvres like takeoff, landing, hovering, and flying in straight lines. Intermediate skills involve combining movements — like flying forward while rotating (yaw), orbiting a subject, and maintaining a steady shot. At the intermediate level, you also learn to adjust camera angles, manage wind drift, and fly smoothly for cinematic footage.
How do I know if I’m ready to fly my drone in more challenging locations?
You’re likely ready for more challenging environments (like over water or near cliffs) when you can confidently handle your drone in basic situations, recover from minor flight errors, and make smooth adjustments without panic. A good sign is when your footage becomes consistently stable, and you can maintain orientation even at distance. If you’re unsure, start with a location that’s slightly more complex than your usual flying spot, and increase difficulty gradually. You can also read our guide on when you’re ready to fly over water.
 ***
***
Ivana Katz is a Sydney based website designer and travel blogger. Having her own business has given her the freedom to explore the world. She believes travel is the best teacher and her passion for adventure, writing and photography has taken her and her son to some amazing places, including Hawaii, Canada, Fiji, Greece and Czech Republic. Ivana’s favourite thing about travelling is learning, discovering hidden gems and creating memories. She loves nothing more than inspiring other women to chase their dreams and explore the world with their families and friends.