Setting Up Your Drone: A Step-by-Step First Flight Checklist
So, you’ve just unboxed your first drone. It’s sleek, it’s exciting, and you’re already imagining cinematic beach flyovers and epic mountain shots.
But before you rush out the door and hit the launch button, let’s talk about something far more important: setting your drone up properly.
This isn’t the part most people get excited about — but it’s the part that will save your drone from a very short and tragic career. Trust me, a few careful steps now can prevent a lot of stress later.
Looking for beginner-friendly gear to go with your drone? Check out our Drones and Accessories collection — including spare batteries, landing pads, memory cards, and other essentials to help you fly safer and smarter.
Step 1: Charge Everything First (Yes, Everything)
This might sound obvious, but you’d be surprised how many new pilots grab their shiny new drone, head to the park, and realise the battery is still at 17%. Don’t be that person.
Your drone, remote controller, and smartphone or tablet are all part of the flight setup, and they all need to be fully charged before you take off for the first time. A low battery doesn’t just cut your flight short — it increases the chances of glitches, forced landings, or firmware problems.
Before anything takes off — you need power. That means:
- Charging the drone battery
- Charging the controller
- Charging your phone or tablet (if you’re using an app-based controller)
- Charging extra batteries (you did get a spare, right?)
Pro Tip: Never try to fly with a half-charged battery “just to test it out.” It can mess with calibration and dramatically shorten flight time — or worse, trigger an emergency landing in the middle of nowhere.
Step 2: Install the Right App
Modern drones aren’t just controlled by remote — they’re smart flying machines that rely heavily on mobile apps for setup, flight monitoring, GPS calibration, camera settings, and real-time video feed. If you skip this step or download the wrong app, your drone might not take off at all, or you’ll lose access to critical features mid-flight.
Most drones (like DJI) require an app for setup, GPS calibration, camera control, and updates.
- Go to your drone manufacturer’s website to get the correct app — don’t rely on app store searches, especially on Android.
- Examples: DJI Fly for DJI drones, Autel Sky for Autel, etc.
Once downloaded, connect your phone to the controller and open the app before you power on the drone.
Step 3: Update Firmware
This is the step that almost every beginner skips — and then regrets when their drone starts acting up. Firmware is basically your drone’s internal software, and like any piece of tech, it needs updates to fix bugs, improve stability, and sometimes unlock new features. Manufacturers release updates for your drone body, remote controller, and even smart batteries.
The trick is to do this at home, before your first flight — where you’ve got stable Wi-Fi, time to troubleshoot if something goes weird, and no pressure to get airborne. Trying to update firmware in the middle of a field with patchy mobile reception and half a battery left? That’s how frustration starts. Don’t risk it — update everything first and give your drone the best chance of flying smoothly from the start.
- Firmware updates fix bugs, add features, and prevent critical flight errors.
- Update your drone, controller, and even the batteries (smart batteries need updates too).
- Do it at home with solid Wi-Fi — not in the field with poor signal.
Step 4: Format the Memory Card
It’s tempting to just slide in whatever old microSD card you have lying around and hit record — but that’s a rookie move. If your memory card hasn’t been formatted properly for your drone, you risk corrupted footage, recording errors, or running out of space halfway through a perfect flyover. That’s not just frustrating — it could mean losing irreplaceable shots.
Insert a clean microSD card and format it inside the drone via the app. This prevents:
- Corrupted footage
- Unreadable files
- Storage issues mid-flight
Pro Tip: Use U3 or V30-rated cards if you’re shooting video — slower cards might drop frames or stop recording unexpectedly.
Step 5: Calibrate Compass and IMU
Calibrating your drone’s internal sensors might not sound exciting, but it’s a crucial step for safe and stable flying — especially on your first outing.
These systems help your drone understand its orientation and environment, and without proper calibration, even a brand-new drone can drift, behave unpredictably, or fail to return home correctly. Think of this step as fine-tuning your drone’s sense of balance and direction. It only takes a minute and can prevent a lot of unnecessary stress.
Calibrating the compass and IMU (inertial measurement unit) ensures your drone knows where it is and how to stay balanced. If they’re off, your drone could:
- Drift while hovering
- Fly erratically
- Misjudge where “home” is
Do this before your first flight, especially if:
- You’re flying in a new area
- You’ve travelled a long distance
- The drone has been in storage
Step 6: Check Your Return-to-Home Settings
Return-to-Home (RTH) is one of your drone’s most valuable safety features — but it only works properly if it’s set up correctly before takeoff. Many beginner pilots assume it’s automatically accurate, but that’s not always the case. A poorly configured RTH can lead your drone right into a tree, or worse, attempt to land somewhere it never should. Taking a moment to review your RTH settings gives your drone a reliable escape plan — and gives you peace of mind while flying.
Return-to-Home (RTH) is what brings the drone back if:
- You lose signal
- The battery runs low
- You manually trigger it
Make sure:
- The home point is correctly set (usually where you took off)
- The RTH altitude is high enough to clear obstacles (30–50m is a safe minimum)
Related: Rookie Mistakes to Avoid
Step 7: Double-Check the Rules
You might be eager to get flying — especially if you’re standing in a wide-open, beautiful spot — but that doesn’t automatically mean it’s legal to launch. In Australia, drone regulations are pretty straightforward, but it’s still your responsibility to know where you can and can’t fly. Even seemingly empty areas can be restricted due to nearby airports, national parks, or wildlife zones. A quick check before you take off can save you from fines, awkward conversations, or worse — having your drone confiscated.
Make sure you’re legally allowed to fly. Use safety apps like:
- OpenSky
- Can I Fly There? (CASA)
- AirMap
Basic rules to follow in Australia:
- Stay 30m away from people
- Fly below 120m
- No flying over crowds
- Always keep your drone in sight
Related: Where Can You Fly a Drone?
Step 8: Scout Your Takeoff and Landing Spot
Your drone’s first moments in the air — and last moments before landing — are when things are most likely to go wrong. That’s why choosing a safe, clear area for takeoff and landing is just as important as flying itself. You want a spot that gives you plenty of space to launch calmly and land confidently, without dodging people, trees, or unexpected gusts of wind. Taking a minute to scout your surroundings will set the tone for a smooth, stress-free flight.
Choose a flat, open area away from trees, power lines, or wildlife.
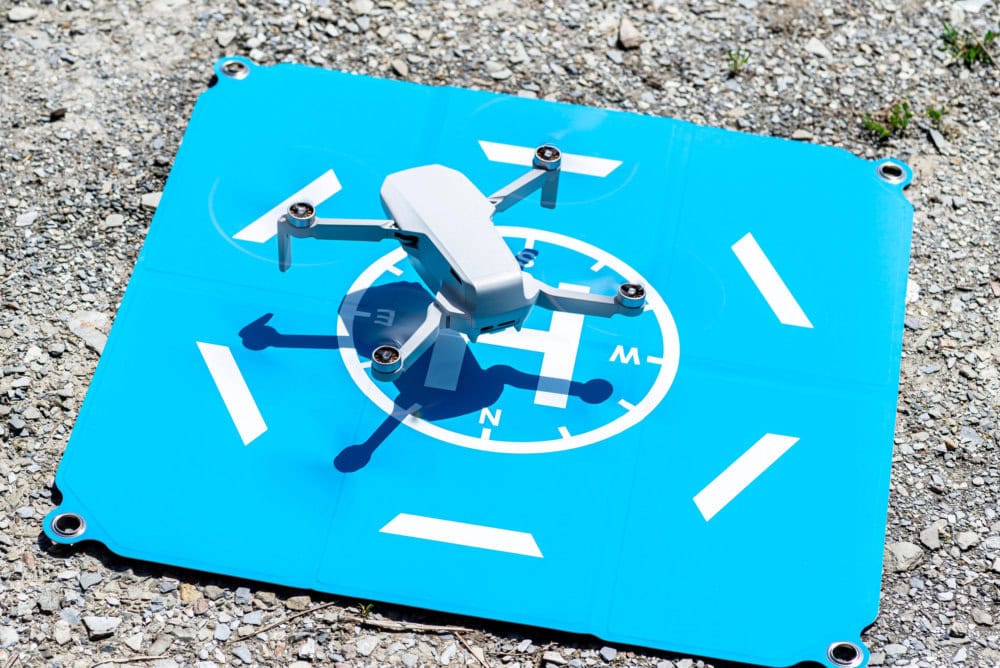
- Avoid sand (use a landing pad)
- Avoid wet grass or gravel
- Check for overhead and ground-level obstacles
Step 9: Run a Pre-Flight Checklist
Now that your drone is powered, updated, and ready to go, it’s time for one final pass — the pre-flight checklist. This is your last line of defence against silly (but common) mistakes that can turn a great flight into a stressful one. Think of it like giving your drone the green light. A quick scan of the essentials will help you catch anything out of place and ensure everything’s working exactly as it should before you hit that launch button.
Do a quick scan before takeoff:
- Props securely attached
- Battery fully inserted
- Gimbal protector removed
- GPS signal locked
- No compass or app errors
- Live video feed working
Related: Beginner Drone Flying Tips
Step 10: Record, Relax and Enjoy!
You’ve done the prep, ticked off your checklist, and chosen a great spot — now it’s time to fly. Takeoff can feel a little nerve-wracking at first, but once your drone is in the air and hovering steadily, give yourself a moment to breathe and enjoy it. Start slow: hover, rotate, ease into gentle movements. There’s no pressure to capture perfect footage straight away. Just focus on building confidence, getting familiar with the controls, and most importantly — having fun. You only get one first flight, so make it memorable (and recorded).
Start simple: hover, pan slowly, and get comfortable. Record even basic footage so you can review and improve later.
Final Tips for First-Time Flyers
Flying a drone for the first time is exciting — but it’s also where most people make their first mistakes. That’s perfectly normal. The key is to start small, stay calm, and give yourself plenty of space to learn. These final tips will help you avoid unnecessary stress, keep your drone safe, and make your early flights a whole lot more enjoyable. Remember: every expert pilot started with a wobbly first launch — it’s all part of the journey.
- Keep initial flights under 5 minutes
- Fly low and close
- Avoid overwater flights until you’re confident
- Bring a friend to help spot obstacles
Related: When Are You Ready to Fly Over Water?
Related: How to Improve Your Drone Flying Skills
Explore Further
Once you’ve nailed your setup and first few flights, it’s time to explore some of Australia’s most drone-friendly locations.
Check out the AdventureHQ Drone Guides
FAQs About Setting Up Your Drone For The First Time
Do I really need to update the firmware before flying?
Yes — absolutely. Firmware updates often include critical fixes for GPS accuracy, flight stability, and battery performance. Flying without updating could result in poor signal, app crashes, or your drone behaving unpredictably. Always do it before your first flight, and preferably at home with strong Wi-Fi.
How long does it take to get a GPS lock before takeoff?
Usually 30 seconds to 2 minutes. It depends on your location, weather, and whether the drone has flown in that area before. You’ll know it’s ready when your app confirms “Home Point Updated” or shows solid satellite lock. Never take off without GPS lock — especially on your first flight.
Should I calibrate the compass and IMU every time?
Not every time — but definitely before your first flight, after any major update, or if you’ve travelled a long distance. If your drone starts drifting, gives compass errors, or behaves oddly, recalibrating is a great first troubleshooting step.
What kind of memory card should I use?
Use a high-speed microSD card — look for U3 or V30 rating or higher, especially if you’re filming in 4K. Lower-grade cards can cause recording failures or dropped frames. Always format the card in the drone before your first flight to avoid compatibility issues.
Can I skip Return-to-Home settings if I’m not flying far?
Definitely not. Even short-distance flights can go wrong — signal loss, sudden wind, or battery drain. Your drone needs to know where to return safely, and at what altitude. Always check that the RTH height is set higher than the tallest object nearby.
How do I know if I’m flying in a legal zone?
Use a drone safety app like OpenSky, AirMap, or CASA’s “Can I Fly There?” These tools show restricted airspace, national park rules, and temporary no-fly zones. Even remote beaches can be off-limits if they’re near a helipad or protected habitat.
What’s the best place to take off and land?
Look for flat, dry, open ground — like a grassy patch or carpark. Avoid sand, gravel, or wet grass unless you have a landing pad. Stay well away from trees, fences, and power lines. If you’re near the ocean, give yourself extra space to land calmly.
Can I fly without using the drone’s mobile app?
For most modern drones, no. The app is essential for setting home points, calibrating, updating firmware, seeing live video, and unlocking flight zones. Always install and test the app before heading out to fly.
Do I need to register my drone in Australia before flying?
If your drone is under 250g and you’re flying for fun (like a DJI Mini 2 SE), you don’t need to register it or get a license. But you still need to follow CASA’s rules — including staying under 120m and away from people. For drones over 250g, registration and operator accreditation are required.
Related: Where Can You Fly a Drone?
 ***
***
Ivana Katz is a Sydney based website designer and travel blogger. Having her own business has given her the freedom to explore the world. She believes travel is the best teacher and her passion for adventure, writing and photography has taken her and her son to some amazing places, including Hawaii, Canada, Fiji, Greece and Czech Republic. Ivana’s favourite thing about travelling is learning, discovering hidden gems and creating memories. She loves nothing more than inspiring other women to chase their dreams and explore the world with their families and friends.